
PianoLights

Description
Bluetooth MIDI device to power led strip and highlight the usb-midi piano keys. If you like Rousseao youtube channel with nice piano lights - it’s your way to get the similar effect.
Authors
- Idea & realization: Rabit
Hardware
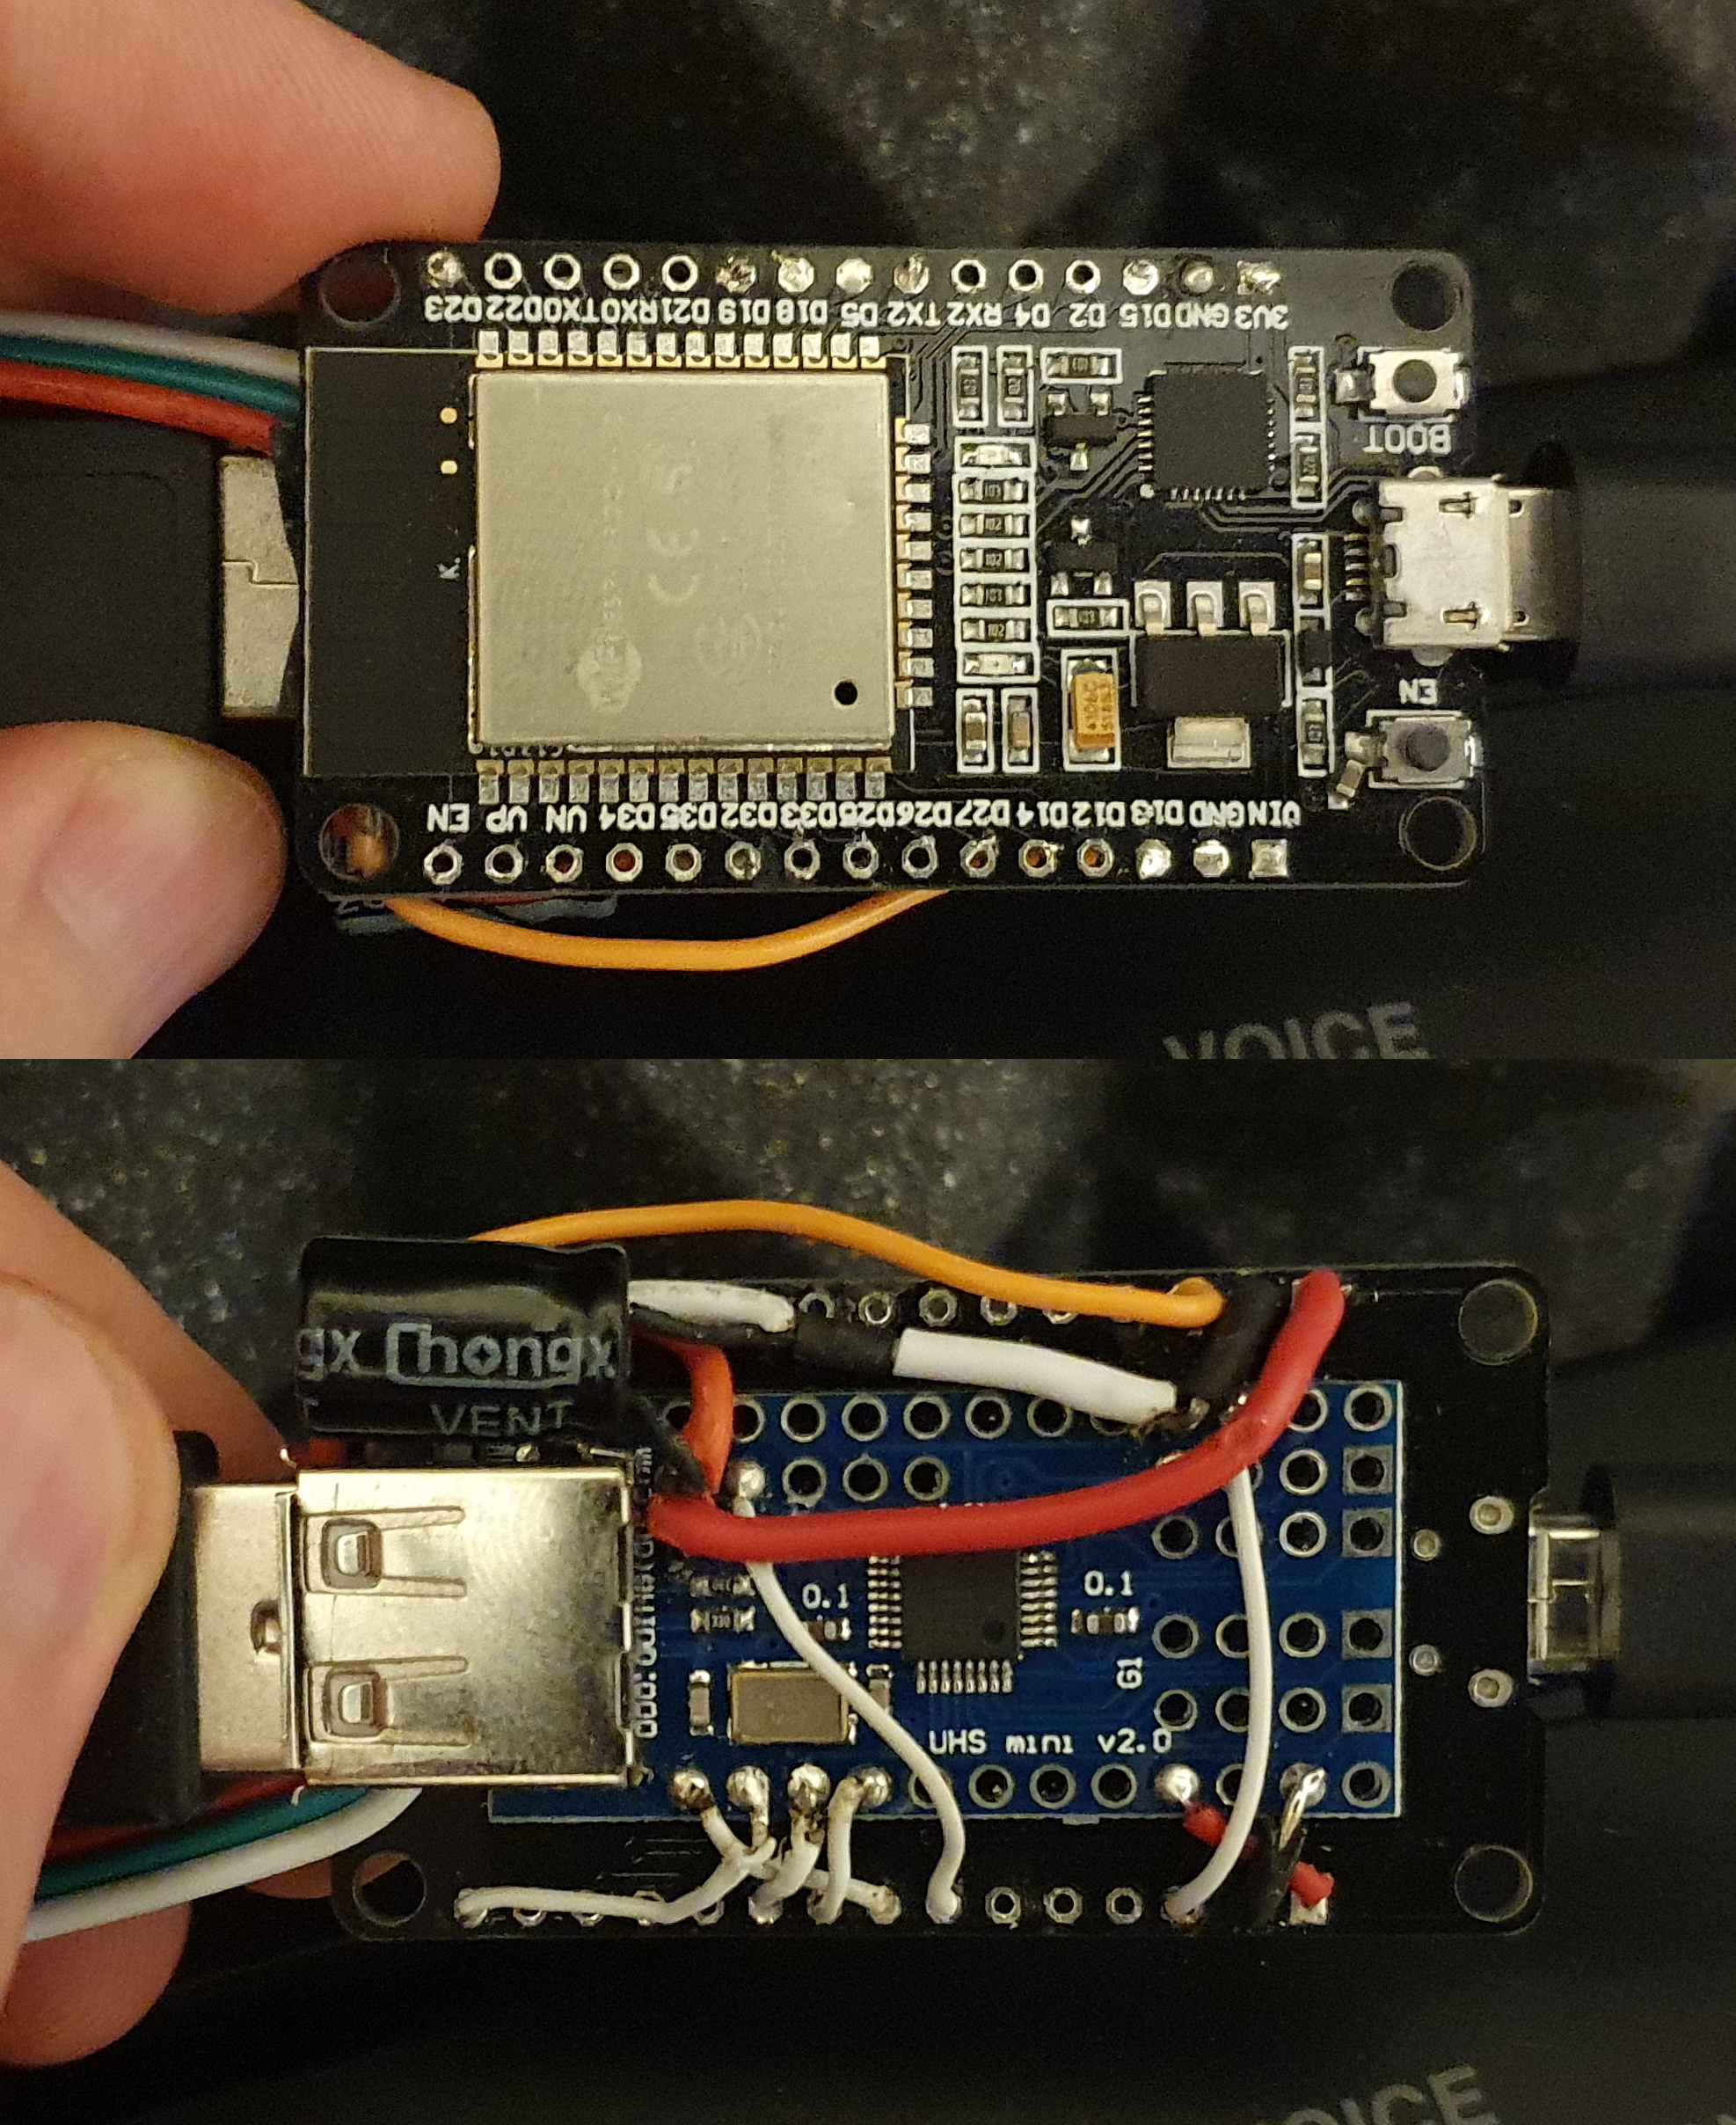
- MC: ESP32 Dev Board (MELIFE ESP32 ESP-32S Development Board 2.4GHz Dual-Mode WiFi + BT)
- SPI USB controller: MAX3421E-based (HiLetgo 2.0 ADK Mini USB Host Shield SLR SPI)
- 2 USB cables: first to power the device & LED strip and another to connect to MIDI piano
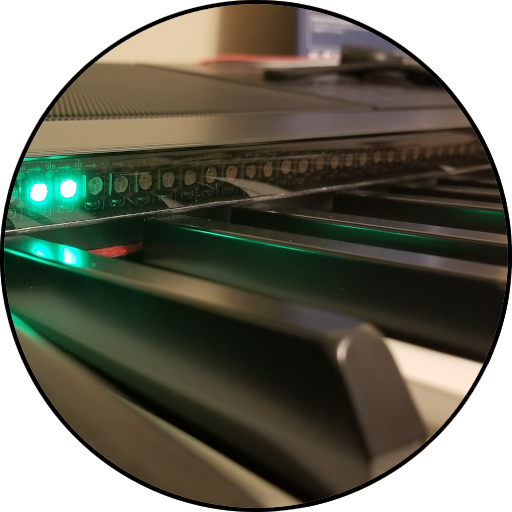
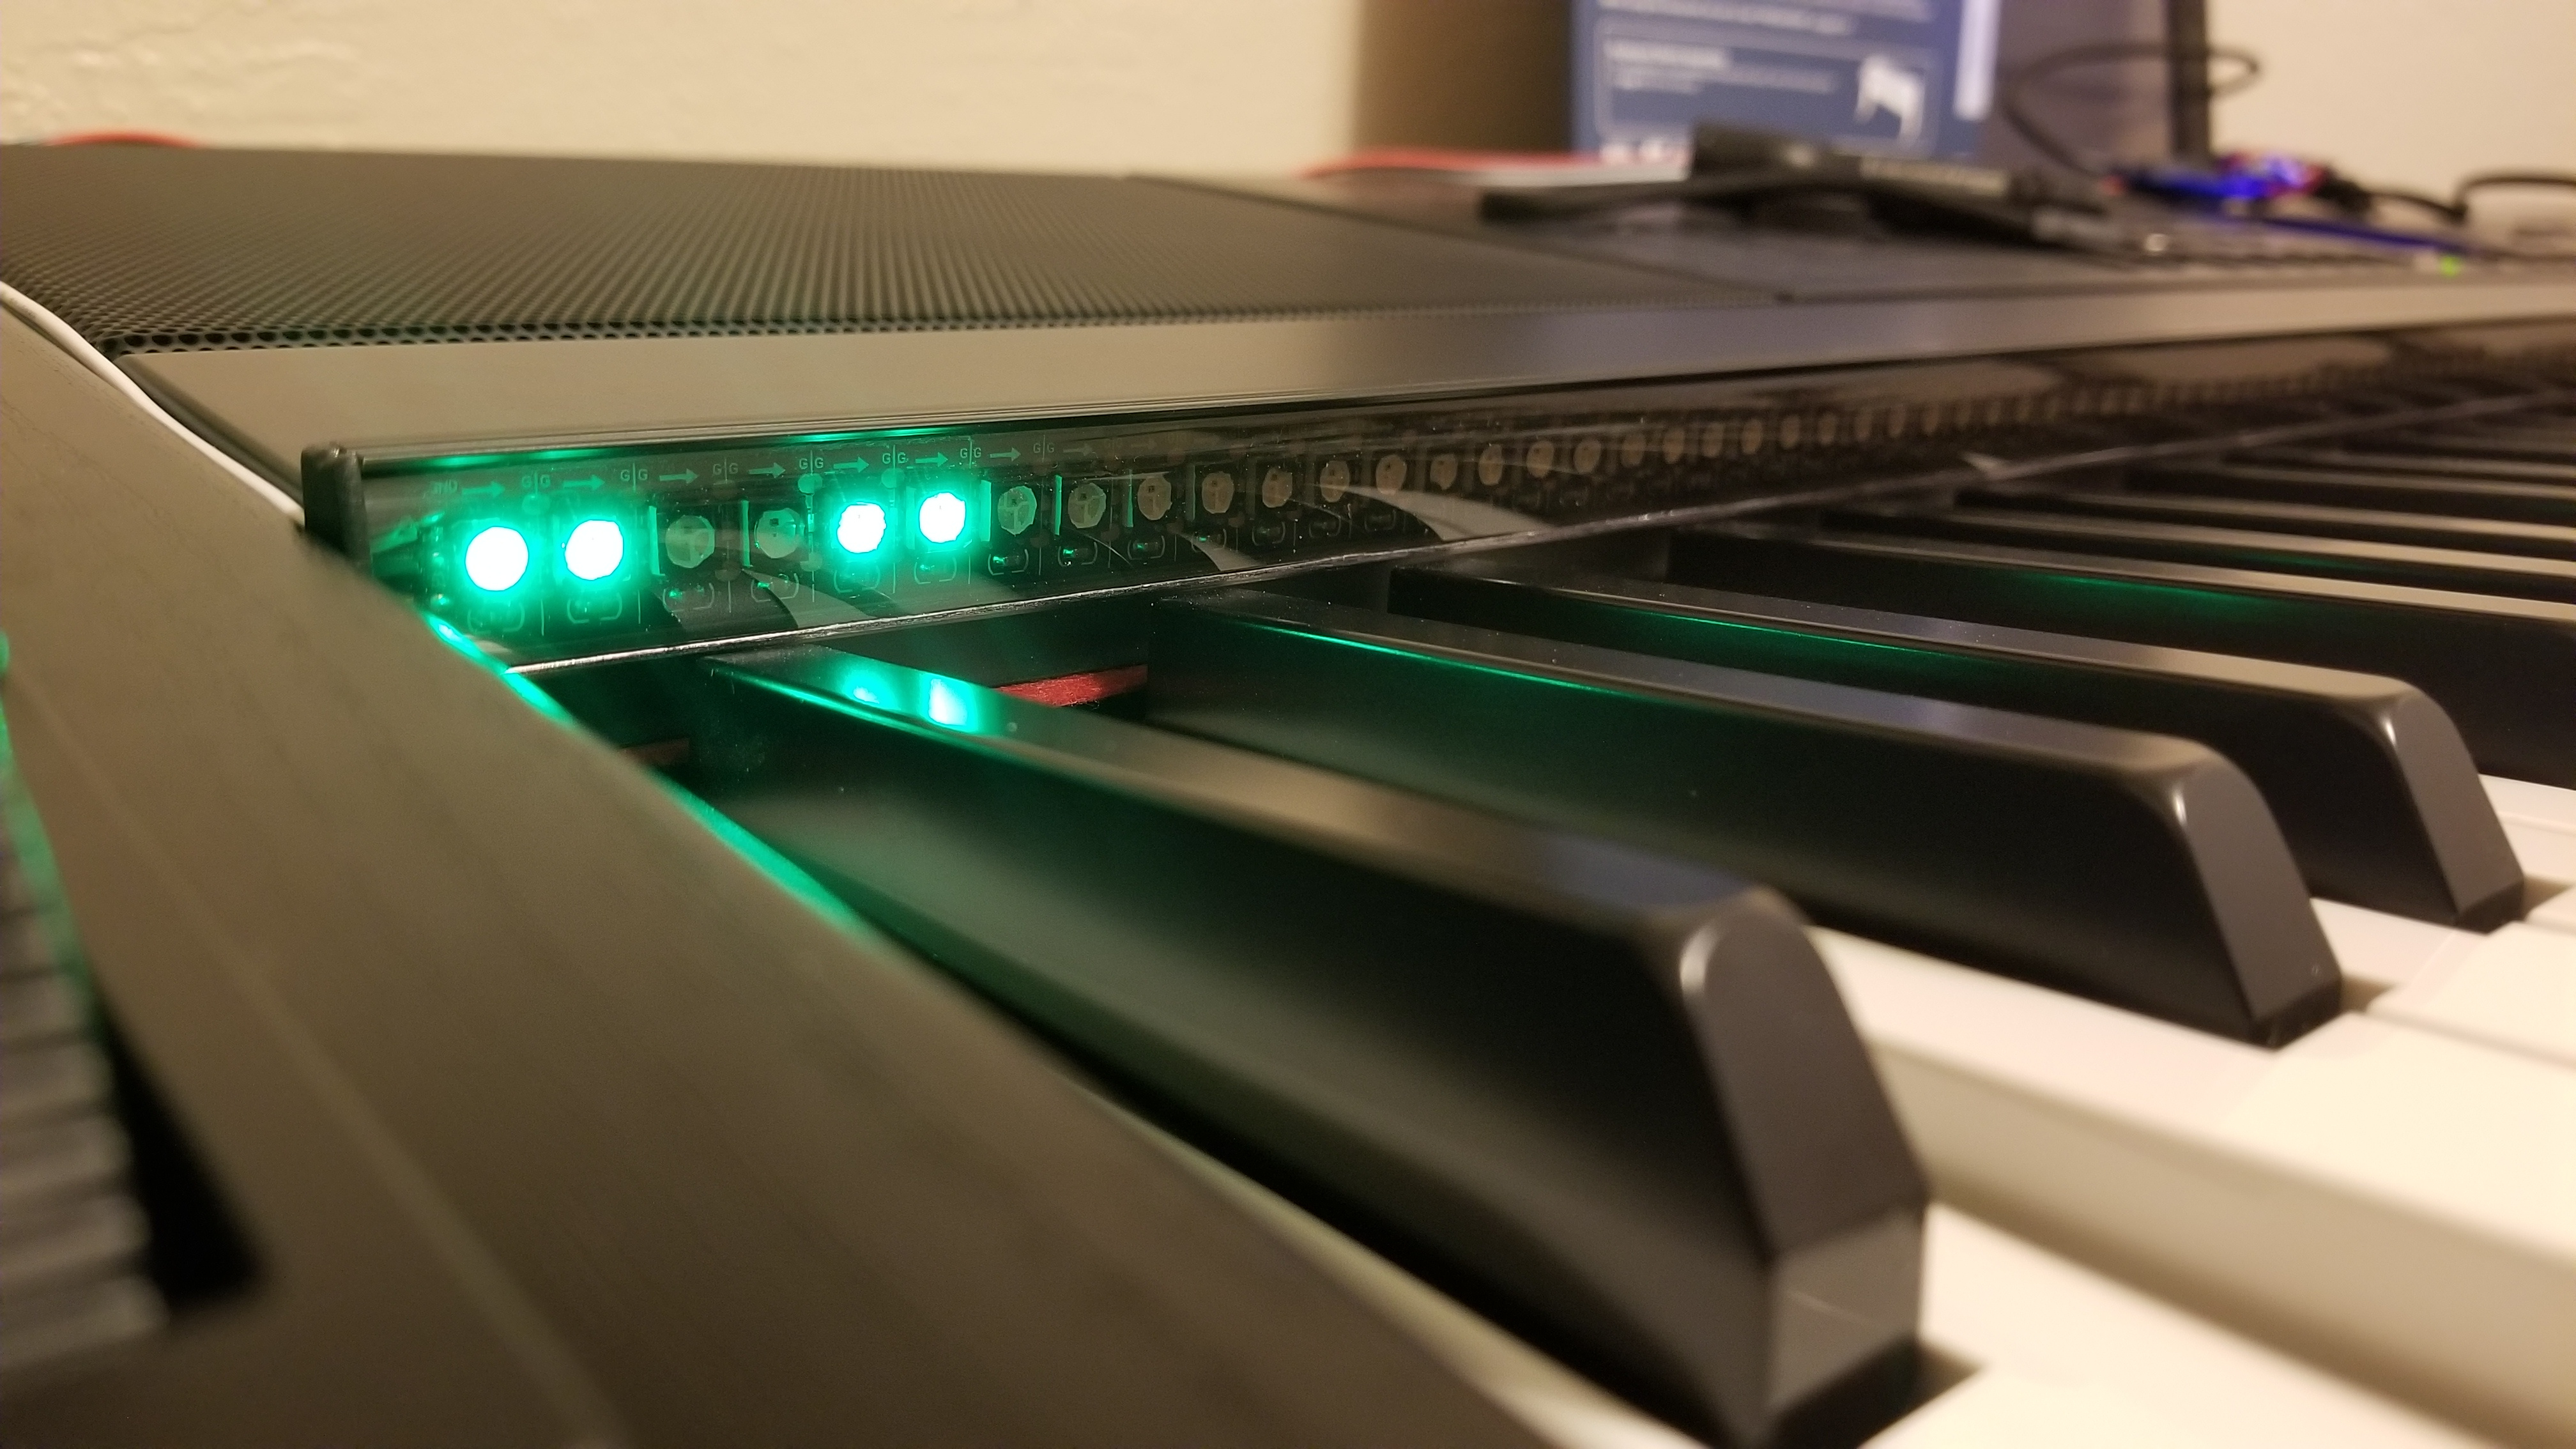
- RGB LED strip: WS2812B RGB 5050SMD Individual Addressable 3.3FT 144(2X72) Pixels/m
- 22 AWG 3-wire cable line
- LED channel: Muzata Black LED Channel System, Smoke Transparent Diffuser, 6.6FT/2Meter U Shape U1SW BB 2M,LU1 L2M
- Soldering iron, some wires, capacitor 470μF/25V & resistor 330Ohm, double tape to stick 2 boards together
Features
- Non-destructive addon to your piano or midi keyboard
- Compact and not pricey (~$40)
- Lighting when you press the key
- Bluetooth LE MIDI -> USB-MIDI proxy
- Supports Synthesia piano lights feature
- Choose colors & transitions
- Supports different ranges of keys number and leds per key
HowTo Use
Android
- Download
MIDI BLE Connectapplication from Google Play - Connect
PianoLightsdevice to your powered piano via USB and power it up - Make sure the
PianoLights BLEis not paired with your Android already - Run the
MIDI BLE Connectapplication and find thePianoLights BLEin the list - Now the device available as MIDI, while the
MIDI BLE Connectis running - Go to Synthesia setup chapter
Synthesia setup
- Switch to Synthesia (do not use
backbutton, onlyhomeorswitch appones) - Go to
Settings --> Music Devicesand select “Android M MIDI” inDevice Connection Method - Now you will see the
PianoLights BLEin theMusic InputandMusic Outputlists - Select the
PianoLights BLEinMusic Inputlist - Enable input for device and setup as usual - press lowest and highest key on your piano
- Go back to
Music Devicesand selectPianoLights BLEin theMusic Outputlist - Enable output for the device
- Disable
My Notesswitch - otherwise they will be duplicated - If you want the LED to highlight keys to press feature - click on
Key Lightsitem and select the 16th MIDI channel in the list - you will see that some LEDs are white and moving right. - Other defaults should be ok
DIY info
WARNING: the LED strip contains 176 RGB LEDs which in full brightness could consume > 10A. The
logic contains POW_BUDGET_* constants which limiting the potential usage to make sure the led
strip will consume less then constrains (wires, power source) could provide.
This project is DIY, so you will need to apply some non-trivial soldering skills and properly tuned hands.
Tricky moments
- LED Strip The most tricky one - it contains 144 pixels/m, but we need 146 pixels/m, because standard piano contains 88 keys / 1200mm (side keys are wide, so we use just half of them), means 176 LEDs total. You see - 2 more LED’s means we will need to resolder the strip with cutting small parts of strip in between the LEDs. This way you will get perfect 2 LEDs per key.
- Strip 3-wire cable Of course you can use higher gauge to support more current through, but it’s better to find the max of your power source (piano USB host). 22 AWG could provide ~2.4A, so for minimal functionality (200mA) that’s more then enough. If you worrying about potential fire - put a simple fuse on LED power rail.
- LED channel To mount the led strip properly - better to use some case. Thin aluminium LED channel is perfect for that, but it could be not so thin as required. So you can cut one side of profile, cut the plastic cover and combine them together.
- ESP32s dev board Consumes quite alot of power, so you can try to use another board - but be prepared to change the source code to fit in your microcontroller constraints.
Useful links
- ESP32 arduino: https://github.com/espressif/arduino-esp32
- MIDI BLE Connect source code: https://github.com/philburk/android-midisuite/tree/master/MidiBtlePairing
Arduino IDE configuration
- ESP32 Dev Module
- Flash Mode: QIO
- CPU frequency: 240MHz (WiFi/BT)
- Flash Size: 4MB (32Mb)
- Partition scheme: default 4MB with spiffs (1.2MB app/1.5MB SPIFFS)
- Flash frequency: 80MHz
- Upload speed:921600
- Core debug level: none
- PSRAM: disabled
- Port: ttyUSB0
Libraries
The project uses a number of libraries you need to download from IDE:
- ESP32 Digital RGB LED Drivers To control the LED strip
- USB Host Shield Library 2.0 To interact with USB board via SPI
Build code
Just check the configuration section, make sure the settings is ok and that all the libs is here,
press Upload button in your Arduino IDE and everything should be fine.
OpenSource
This is an experimental project - main goal is to test State Of The Art philosophy in practice.
We would like to see a number of independent developers working on the same project issues for the real money (attached to the ticket) or just for fun. So let’s see how this will work.
License
Repository and it’s content is covered by Apache v2.0 - so anyone can use it without any concerns.
If you will have some time - it will be great to see your changes merged to the original repository - but it’s your choice, no pressure.